This guide is designed for business owners and decision-makers within manufacturing and production industries who are considering investing in industrial automation.
Here’s what we’ll be discussing:
- A transparent breakdown of the automation integration process
- What to expect when working with an automation integrator.
Let’s get started.
Industrial Automation beyond Case Studies
If you’re considering some form of factory automation equipment, it’s very likely you’ll see a lot of case studies from automation companies. What you rarely see is an in-depth description of the industrial automation integration process outside of closed doors. There are good reasons for this:
- Even the most basic automated equipment integration requires some custom engineering, programming, and parts. Whenever you’re dealing with custom software, hardware, or assembly, you’re creating some aspects that have never been created before. That means the qualities of the automation integration must balance price, schedule, and delivery.
- Every product is different, so every machine is different. A larger machine with more functions, stock-keeping units (SKUs), and parts is going to have a different cost and timeline compared to a straightforward machine-tending robot arm or a packaging and palletizing project.
- Just like with any capital investment, global black swan events, breakthroughs in technology, and changes in customer needs can impact the delivery of some stages. Leaving room in the process for changes is a necessary condition of a project that you’re hinging your future business on.
- Not every automation integrator is a single source integrator. If your integrator doesn’t have language in their site or contract indicating they’re a single source, vertically integrated automation integrator, they might not actually be able to predict how costly the length of the delivery timeframe is or the condition of the stages produced by a third-party contractor. Less guarantees for quality, condition of the project, and the final integration means more ambiguity in the planning and delivery.
With those caveats in mind, we’d like to pull back the curtain on our factory automation process. Understanding this simplified outline should improve the quality of your custom machine integration.
Related Reading: Understanding Turnkey Automation in Manufacturing
Step 1: Automation Assessment

The Automation Assessment is all about narrowing down the targets of the project to something realistic, practical, and financially sound. We identify the best opportunities based on the return on investment (ROI) and risk. Let’s break this step down.
30-minute Virtual Opportunity Discussion
Every Automation Assessment meeting should begin with a risk-free virtual discussion about the project. You should not expect to have to outline parts, machine designs, or other machine specifics. This meeting is simply talking about the process you need to automate. The most productive virtual discussions gather the following pieces of information:
- “What do you do?”: Understanding your industry is critical. A machine in the medical space will have different regulations than agriculture, aerospace, etc. The type of manufacturing you do, such as injection molding, industrial electronics, job shop machining, or packaging can provide meaningful background for potential machine details. By taking the time to learn about your business, we discover where you are in the market, where you want to be, and whether automation can help you achieve your goals. The total number of employees in your business will also be discussed.
- “What do you need automated?”: The specific part, process, or product. Providing this information gives your integrator a rough estimate of how much custom engineering is needed, which type of machine may be needed, and how complex the final design will need to be.
- “How many shifts/employees are on this task now?”: This helps calculate the value of the machine in the ROI calculations by how many workers it would displace. This is also a chance to indicate whether the machine will work additional shifts or require lights out/unattended qualities in the engineering.
- “At what rate do you want to make parts/units?”: Having specifics about how many parts or units you make now and how quickly versus the expectations of the machine is critical to an authentic ROI (how many seconds do we have to complete certain tasks). If we’re building a stand-alone machine, we need to know how many units you need annually and how many shifts or hours you plan to run it. Differences in additional actions, specifics on quality, and output speed can exponentially increase or decrease the cost, time, and engineering required for your project.
- “What is your budget?”: All custom automation integration projects should be treated as capital investments similar to buying property, land, or vehicles. A custom automated machine or robot integration can easily cost six to seven figures. Estimating a reasonable budget is an effective way to establish whether an automated machine is practical for the expectations of everyone involved. We offer to run a budget calculator for customers unsure of what they should spend and also make available our Reverse ROI calculator to allow theoretical capital expenditure calculations.
Related Reading: How You Should (and Shouldn’t) Calculate
Your Return on Investment with Your Integrator
NDA (Non-Disclosure Agreement)
Ask your integrator to provide a standard mutual automation NDA to support a fully open discussion. Both sides will want to go further into specific details on products and processes and a mutual NDA can provide the legal protections you need to constructively share information.
This can come after the virtual discussion as that’s more about project viability than sharing critical intellectual property (IP) details. The NDA allows the integrator to share their own IP including any provided proposals. Once NDAs are signed, the Automation Assessment process can go deeper.
ROI Calculation

After the Virtual Opportunity Discussion, you get an early ROI calculation. This is an estimate, based on the provided process metrics, of how long it will take for your automated solution to make back the investment. For a reasonably sized project, this takes one to four years, but after that point, the machine will provide pure profit.
The ROI calculation covers a comparison of your current business to a potential business estimate from the advanced capabilities of the machine. Not everyone considers the additional opportunities to grow your business in the ROI calculation.
For instance, you can account for the potential profits you can get if you can make three times the products with half the workers, but automators commonly don’t account for the ways those displaced workers can pursue additional sales, take that time to pursue research and development (R&D) or take the time for process improvements.
DEVELOP LLC includes a reverse ROI calculation capable of drilling down into the type of budget you should have available for the type of project you want based on swifter or more gradual project deadlines.
Project Assessment
We offer two options for Project Assessment:
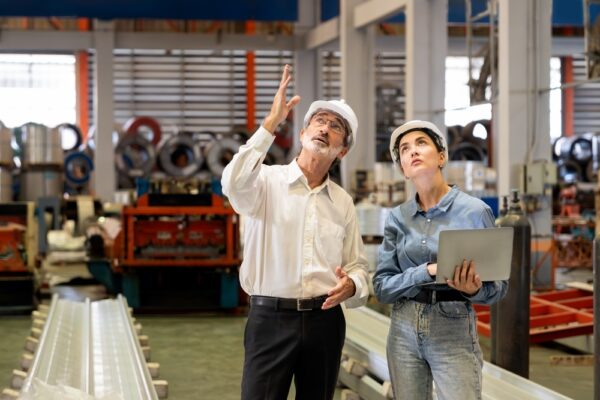
- Onsite: Our project team schedules a full and complete analysis of your production facility with boots on the ground. We get firsthand experience with your current process, parts, and products, and will interview your staff. We collect more data about your process, ask questions, answer your questions, and educate you on the estimates for your production.
We then assess the specific process discussed in the Virtual Opportunity Discussion but also evaluate the other processes in your production facilities for additional automation opportunities and process improvements.
We strongly recommend this if you’re new to automation. DEVELOP LLC will give a full report on your opportunities in as little as four on and offsite hours, and that report can help you learn about what you can automate.
- Virtual: You can provide a video of a walkthrough of the facility through a smart device. This focuses on a specific project, asking questions and narrowing in on details that refine that project into a machine concept.
Concept Refinement
In a series of follow-up meetings, we collaborate. If multiple opportunities were identified, we provide a scatterplot of project options ranking each of them by capital expenditure, ROI, and risk. We meet with the customer to select one opportunity to build an official Statement of Work.
In the event of a single project, we refine that project into a more specific machine concept that targets the quickest ROI and the largest financial gain. In both cases, we apply details of how it impacts the other lines in the production facility, what kinds of power and labor it needs to run, and how it would support the growth of the business around it.
Statement of Work
Next, we hold calls, emails, meetings, and conversations to generate a mutually agreed-upon Statement of Work. This series of discussions provides the following:
- 3D CAD: This is a computer-assisted draft of your final machine based on realistic part selection.
- Outline of services: A high-level overview of the responsibilities to each other during the project.
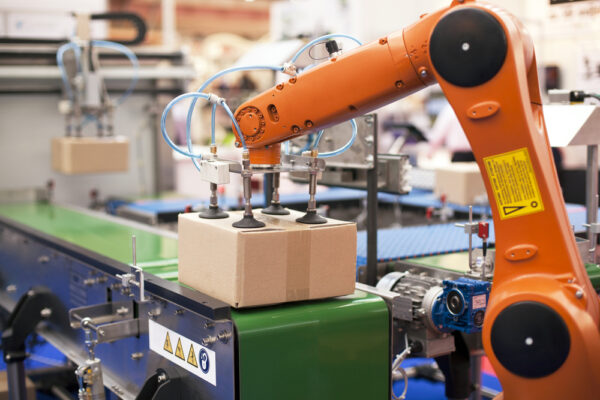
- Specifications: A description of specific actions taken by the machine (cutting, drilling, stamping, etc.) or type of process (packaging and robotic palletizing systems, pick and place, machine tending, adhesive dispensing, linear transfer machining, etc.).
- Machine targets: Specific factory acceptance targets for things like how many seconds it takes to process a part, how many hours the machine runs, the number of shifts, and annual units.
- Specified components: An outline of the major subsystems, modules, and parts with their specific purposes.
- Safety: Description of the protection, guards, and precautions to expect built into the machine.
- Stage gates: A series of stages outlining a timeline of the separate stages of the project including a release of funds payment structure that runs alongside the stages.
- Change orders: An outline of a clause for payments in the event of late changes, late requests for additional phases, or requirements outside of the agreed-upon specifications.
Kickoff Meeting
The Statement of Work is signed, and the custom automation project begins.
Related Reading: Demand Communication: Inoculation Against Late Changes to
Your Industrial Machine Design Proposal
Step 2: Design and Engineering

This stage remains collaborative. Now that the main scope of the machine and the Factory Acceptance Testing (FAT) requirements are mutually agreed upon, the primary responsibility shifts. These requirements are agreed-upon targets that demonstrate where the final machine is meeting or not meeting the project expectations.
At this point, the bulk of the work is in the hands of the integrator. Their task is to translate these high-level goals into the technical capabilities of the machine.
In this stage, the integrator updates you on progress, giving demos and asking for feedback at distinct stages. While you’re solicited for samples and details specific to the application, a lot happens internally with the integrator.
Internal Kickoff Meeting
You may have seen a 3D design in the Statement of Work and wondered, “Doesn’t this represent the final machine design?” True, during the Kickoff Meeting where you signed the Statement of Work, you met with the automation integration team and they went over the full scope of the project, including a 3D Computer-Assisted Design (CAD) model capable of demonstrating a working concept of your machine. The CAD model in the Statement of Work is a working draft, not a final model. There are good reasons for this.
In the Internal Kickoff Meeting, every member of the DEVELOP LLC team comes together to formally plan the project in an internal-only kickoff meeting. The CAD and high-level requirements are presented to the entire team and designated team members are assigned their roles in engineering and design (software engineering, electrical engineering, mechanical engineering, building, technical writing, integration, etc.).
With everyone in the room, the team builds a flow diagram of the entire machine process from beginning to end. Every incremental step, from startup to accepting the first part, to processing, moving, selecting, and finishing is charted.
With our single-source guarantee, each member of the design and engineering team has an open invitation to pause. They can call out missed steps, ask questions about vague or puzzling parts of the design, or flag certain parts of the flow diagram for engineering risk or more information needed.
Complications are anticipated, mitigated, and functionally averted using the draft CAD as a model. Sample parts from the production line are examined and theoretical stress testing trials are laid out for the future (i.e., “If we choose this robot arm, will the gripper still be able to grip when swinging the part at max speed”).
The team then prepares for the Customer Kickoff Meeting. They compile a list of detailed questions for the customer about their product automation.
Customer Kickoff Meeting
The team meets with you and presents a more formal introduction to the machine. Roles are explained and finalized. Mutual opportunities are given for Q&As about the process, specifications, and details. The team may show and review multiple design options with customers where preferences play a factor. This is also the point where both teams take one last check for major changes, additional SKUs, or forgotten requirements.
”Proto CAD”
Using the info and feedback in the Internal Kickoff, the entire team is given free rein for Proto CAD design. This stage is concurrent with the Onsite Information Gathering described below.
The best way to design is to start, and our team is given free rein to experiment, draft, change out critical elements, and try solutions with authentic parts selection, software, and schematic design. They review multiple 3D models of the machine to address practical alternatives to the trickier engineering risks of the final machine.
They also review the Human-Machine Interface (HMI) design for aesthetics and functionality. This is another opportunity to consider if there are better engineering choices for a swifter ROI, practical design, and functional engineering. The team wraps up the Proto CAD phase by archiving all their attempts and then restarting the finished design with a committed team-approved vision.
We then outline the Bill of Materials (BOM) and schedule part orders based on lead times. Parts for early prototypes are ordered to make sure an early prototype can mitigate the high-risk aspects of the integration.
Onsite Information Gathering
The project team goes onsite to the production facility. While there, they verify the footprint of the final machine, consider integration with other machines onsite, and check with operators to confirm that the machine design will meet their needs. The team asks detailed questions of the production team and management while providing updates.
While onsite research may only happen once or twice, back-and-forth information gathering continues throughout the entire engineering process with options to discuss outside of scheduled meetings. The team makes themselves available for questions.
Related Reading: Why Machine, Automation, and Robotics Designs Change After the Project Proposal
Prototyping and Final Engineering
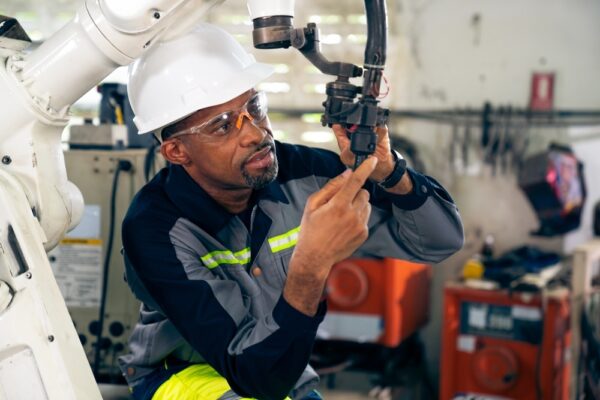
The team then assembles working prototypes of individual modules, focusing on the areas identified as the highest engineering risk. They collaborate with multiple reviews of a final 3D CAD, completed electrical engineering, and fully scoped software. The final HMI is assembled and refined.
Rigorous cycle time verification studies and Factory Acceptance Testing (FAT) take place to drill any issues and stress test the quality of the machine.
- The vertically integrated team performs a top-to-bottom review of the physical prototypes.
- The technical writing team drafts comprehensive guides, safety manuals, and training materials while centralizing necessary documentation such as the Bill of Materials and Schematics.
- The technical writing team collaborates on a review of the manuals and documentation to confirm clarity and quality in the written instructions.
A last internal meeting is then held to confirm that the machine is ready for the client.
Build and Test
The team assembles a potentially complete version of the machine. FAT standards are rigorously tested from beginning to end using raw materials and products from the customer. The customer comes to HQ, confirms the FAT standards have been met, and minor changes are made to accommodate last requests or fine-tuning.
Final Review Meeting
A final review meeting is held at DEVELOP LLC HQ (or virtually based on preference or convenience) between the project team and the client. All the FAT standards are confirmed in demos of the working prototype. All the specifics of the machine, how it works, and how it looks are finalized.
The customer reviews the machine and is given 30 days to approve the transition from prototype to final build. This is the last opportunity to make minor adjustments to the machine before final integration.
Delivery and Onsite Integration
Our team disassembles the finished machine at HQ and then ships it to your production facility. In a process that takes days or weeks, depending on the scope of the project, we reassemble and integrate the machine into your production line. We run Site Acceptance Testing (SAT) to make sure it runs just as well in your facility as it did in HQ and there are no regressions. Then, we make sure it works in relation to the footprint, environment, and safety requirements of your facility.
Training
While the build team assembles and integrates the machine, our project managers and trainers work with your operators, managers, and relevant staff to train on the safe operation of the machine, and regular maintenance protocol, and answer any questions about what the custom automation does or doesn’t do.
At DEVELOP LLC we specialize in education and training for self-sufficiency. We distribute physical and digital training materials and our staff make themselves available for any last-minute needs related to the machine.
Moving Forward
With the machine rebuilt, and the operators fully trained on the machine, the integration is done. The ROI might be months or years off, but those figures were a snapshot of your old production capability versus what your new machine could do.
You can reap the benefits of your lower facility footprint, your higher production speed, and your higher rate of revenue the second the integration is done. You can redirect any displaced workers to pursue new sales, R&D, or help customers. This will match your enhanced production. A responsibly utilized automated machine positions you to shorten that ROI timeframe with growth opportunities.
Related Reading: Arguments That Shouldn’t Hold You Back from Automating Your Manufacturing
Is This the End?
It can be. But these are the things you should consider before moving on from your integrator:
Maintenance Contract
We train for self-sufficiency and the ability to maintain the custom automated machine, but we understand when customers want to settle for nothing less than expert service. We offer a variety of cost-effective maintenance contract packages that allow for onsite and remote troubleshooting of your technology.
Our machines will also have options for data and remote maintenance. Talk with your project manager to set this up ahead of time as part of your onsite training.
The Next Machine
If you worked with a responsible automation integrator, then your machine was built anticipating future automated additions to your production capacity. When a low-mix, high-volume machine hits a production floor, the staggering increase in efficiency, speed, quality, consistency, safety, and revenue changes your business.
Suddenly, you’ll realize you can pursue bigger customers, new opportunities, and new product lines. The savings from decreased rework, downtime, labor costs, turnover, and production variability mount quickly. Seizing that growth opportunity with another automated machine is what makes the difference between squandering an advantage and visionary planning.
Now that you’re familiar with the process, the team, and what custom automated machinery means to your growth, you can use that knowledge to inform the next machine. A similar machine targeting the best ROI opportunity has the potential for swifter design, build, integration, and lower cost.
You can even choose to augment your custom machine with additional secondary processing (i.e., adding a pick-and-place packaging and palletizing system to the end of the assembly conveyor).
Related Reading: The Top 8 Myths of Automation
You Start Your Automation Journey Today
We hope this has helped you better understand the automation integration process. A lot of people come up to us at trade shows and say, “We definitely want to automate, but we’re thinking of getting that going two years from now.”
The automation process — from planning and communication to engineering — takes significant time, sometimes extending just to secure board approval for such sizable investments.
If you’re considering automating in two years, the time to start talking with DEVELOP LLC is now. Don’t wait until the last minute. Let us help you prepare for a seamless transition into automation. Start by telling us about your project today, schedule a virtual meeting, or reach out directly at (262)-622-6104 to begin your journey toward custom automated machine integration.
Act now to shape your automation future — contact DEVELOP LLC to learn how to kickstart your custom automation project.
About the Author:
Matt Moseman leads as President of DEVELOP, with a strong foundation from the Milwaukee School of Engineering, where he earned both a Bachelor’s and a Master’s in New Product Management. Moseman’s career highlights include his pivotal role in founding NodeUDesign, innovating in automation hardware, and driving DEVELOP LLC to the forefront of industrial robotics with a focus on enhancing productivity and efficiency.